Globally, there are over 4 million podcasts published with thousands of people wanting to join the ranks of fellow podcasters. If you are one such podcast creator who wishes to join the ranks of the top podcasters, a good idea is to list your podcast on Apple Podcasts.
Apple Podcast for Creators is an easy, user-friendly way to make podcasts available to millions of people. However, many wonder how to get a podcast on Apple Podcasts and if there is a simple process.
What Is Apple Podcast Connect & Why Should You Use It?
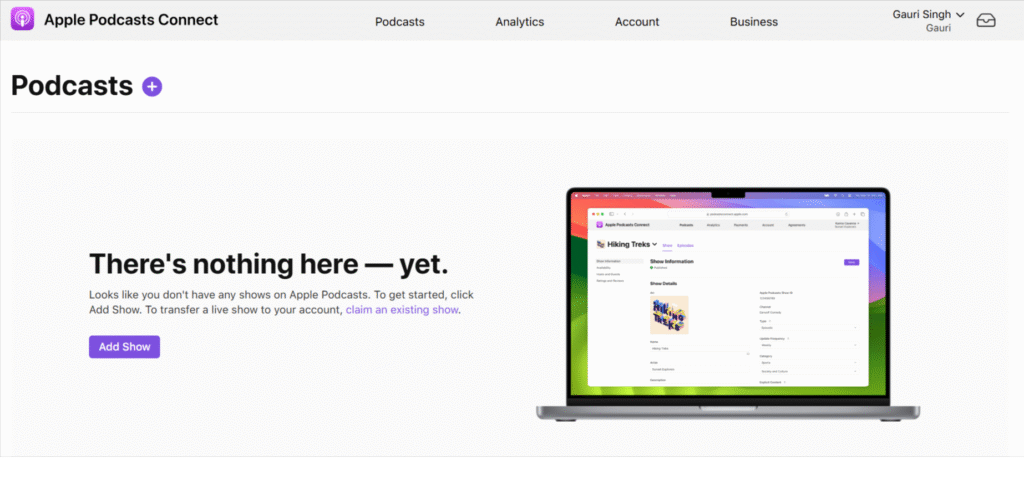
Apple Podcast Connect is an online tool available to podcasters. It allows you to submit your podcasts and makes them available on Apple Podcasts, one of the biggest podcasting platforms in the world.
It also helps podcasters learn how their uploads are doing, manage their shows, offer subscriptions, and reach a wider audience.
Benefits of Listing Your Podcast on Apple Podcasts
- With more than 29 million listeners, Apple Podcasts will help you reach a huge global audience.
- By allowing podcasters to offer premium content via subscriptions, it enables easy monetisation.
- Podcasters can learn how their shows are doing with access to analytics via Apple Podcasts Connect.
- Apple creates curated lists as per listener preferences, which increases the visibility of a podcast.
- Apple’s algorithm constantly connects its listeners to relevant podcasts, so your podcast will be discovered by your exact target audience.
- Last but certainly not least, being listed on Apple Podcasts lends your channel a great deal of credibility.
Step-by-Step: How to List Your Podcast on Apple Podcasts
Step 1: Create an Apple Podcasts Connect Account

If you only have a Managed Apple Account, you cannot use it for Apple Podcasts Connect. You will have to create a fresh Apple Account, add a valid payment method, and verify it. Then, agree to the Terms and Conditions of the Apple Media Service.
To add, you will also require an iTunes Store Account. This allows you to purchase from the iTunes Store, App Store, etc. Simply sign in to the iTunes Store from your Apple device, your PC, or your Android Mobile Device.
If you are using an Android mobile device, download the Apple Music App, sign in with your Apple ID and password. You will get a prompt that says “This Apple ID has not been used in iTunes Store.” Click on the “Review” button, accept the Terms and Conditions, enter your billing and payment information, and submit.
Your Apple Podcasts Connect Account will be linked to your Apple ID. Name your account and let Apple know if this belongs to a company or an individual. If you plan to offer paid subscriptions, join the Apple Podcasters Program.
After the signup process is complete, it is time to go through the legalese. Go through the additional information given in the Business Section of Apple Podcasts Connect as the Legal user and be thorough with all the terms. Once these are done, it is time to submit your show and list your podcast on Apple Podcasts.
Step 2 – Submit Your Show
You can go through one of the three routes to create an Apple Podcast: either submit with an RSS feed or create a fresh show without one, or, opt for a third party like Hubhopper to take on the task.
Uploading the RSS Feed
Go to Apple Podcasts Connect, click on the Add button, and select New Show. Then, choose the option of “Add a show with an RSS feed.” Enter the URL of your RSS feed and choose if you wish to restrict access. Click on Add. Review the Show Information page to make sure everything is accurate, set the Content Right, and provide Contact Information.
From the left side of the screen, choose Availability. This will include Country/ Region, Distribution, Transcripts, Show Release, and Show Claiming. Then, add a subscription, click on save, and publish.
Do keep in mind that your RSS feed will be validated before it reaches Apple. If there is an issue, you need to resolve this before publishing the show.
Keep in mind that Apple Podcasts does not offer the option to host your podcast. So, use Hubhopper to host your podcast and upload it to Apple Podcast.
You can also add an RSS feed to an existing show. Click on the show you wish to edit, under More Actions, click on the Add RSS Feed option. Enter the URL, click Save, and choose Availability and your preferences from the Distribution section.
Creating a New Show
While it is best to use a third-party host that has an RSS feed, you can also opt for the “Add a show without an RSS feed” option. This also allows you to list your podcast on Apple Podcasts. Enter the name of the show, and if you would like to restrict access. However, if you do restrict access, your show will be available only on Apple Podcasts Connect. Click Add and enter the Show Information Page.
On the Show Information Page, enter the Name of the show, the Artist, Description, Channel, Type, Update Frequency, Category, Explicit Content, Language, Website, and Copyright Information. If your show requires a subscription, you can add a custom message for the banner. Set the Content Rights, contact information, and click on Save. Choose Country/ Regions and Show Release under Availability. Add a subscription, click on Save, and publish the show.
Once you complete this, your show will display a “Published” status. However, it will not be available on Apple Podcasts until you add and publish the first episode. If you add a subscription, it must be reviewed and approved, and at least one subscriber podcast must be published.
Distribute Through a Third Party
A third option is to use a podcast distribution platform, like Hubhopper. Host your podcast with us, and we will take care of distributing your show to Apple Podcasts. This takes away the hassle of the cumbersome process from your shoulders, and you will be able to focus exclusively on your next content.
With Hubhopper, all you need to do to list your podcast on Apple Podcasts is create your podcast and distribute it to not only Apple Podcasts but 10+ other podcast directories with one click. Plus, you also get a microsite, embedded players, advanced analytics, and AI podcast tools to level up your podcast.
Try out Hubhopper to list your podcast on Apple Podcasts.
Step 3 – Manage Your Show
The Apple Podcast Connect also acts as an online dashboard where anyone with an account can list your podcast on Apple. Further, it allows creators to manage and monitor shows and gain insights.
Plus, the Apple Podcasts Connect lets people join the Apple Podcasters Program. Then they can claim existing shows, submit a new show, set up a subscription for your show, and view the status of each podcast.
As the creator, you can also manage the availability setting, archive a podcast (or restore one from archives), change the RSS feed URL, and transfer ownership. To add, you may also access the Analytics from the dashboard and learn how well each podcast is doing.
Further, if you need any assistance, you can also get help from the Apple Podcast support.
Step 4 – Apple Podcast Subscriptions
Simply learning how to upload a podcast to Apple Podcasts is not enough. Gain the benefits and monetize by adding subscription benefits to your show after you list your podcast on Apple Podcasts. These offer a premium experience where listeners have to pay for a single show. You can also expand on this idea by offering a channel subscription.
The first step to creating a subscription is adding promotions. On the show page, under the Subscription option, click on Get Started. Then click on Continue. To create one for a specific show, click on “Offer a new subscription”. Then, click on Promote Your Subscription, select the artwork file, and add a name for the promotions.
You can decide which benefits to promote from our list or enter your own, and then click on Save. Our list includes:
- Listen Ad-free
- Subscriber-Only Shows
- Subscriber-Only Episodes
- Subscriber-Only Bonus Episodes
- Early Access to Shows
- Early Access to Episodes
- Archive Access
Once this is done, you have to find a banner and an icon. Click on Add a Banner, write your promotional message, and save. Similarly, click on Add an Icon and select an appropriate file for your artwork.
Then you have to add pricing and a free trial. Under the “Pricing and Free Trial” option, click on Set Up Monthly Price. Select a base territory and price, and then select “Next”. You can also add different prices for different territories. Further, there is also an option to set up the yearly price. You may also provide a Free Trial to your subscribers for a specific duration and region.
You may also provide a Support Site, or people can just visit the Apple Podcasts Support. Last but not least, add subscriber audio to at least one episode (or show). Once this is complete, submit your subscription for review.
Tips, Requirements & Troubleshooting
For an easier podcast submission process, here are a few tips that you can try:
- Managing Common Submission Errors
RSS validation, artwork specs, and audio file issues are not out of the norm. Make sure your podcast meets all the specifications before you upload it. - Best practices for approval
- Crosscheck all specs
- Make sure to use a supported audio format
- Validate your RSS feed
- Offer a proper podcast description
- Be sure to mention advertisements, paid promotions, and explicit content.
- Apple’s support resources
To ensure podcasters have an easy time uploading and publishing podcasts, Apple Podcast Connect provides detailed guides. These include steps on how to submit a podcast, artwork requirements, offering subscription content, and more.
Wrapping Up
Once you list your podcast on Apple, you can offer your unique and engaging content to millions of listeners. Then, as your number grows and you gain traction, you can start monetizing your show.
Offer exclusive subscriptions, engage your listener base, and if you need any help, Apple Podcast Support is here for you.
Create an Apple Podcast by learning how to upload a podcast to Apple Podcasts and get started today.


